Teams includes a webinar feature that allows events to be broadcast to an audience of up to 300-1000 participants, depending on role. Webinars are best suited when the event will include a large number of attendees including some from outside the College, as well as a lecture or presentation and attendee participation through Q&A.
Webinars allow you to set up attendee registration prior to the event, including automated confirmation and reminder emails. They allow for an organizer, co-organizer(s), presenter(s) and attendees. As an organizer, co-organizer or presenter, you can share your screen, video and audio. Attendees can use the chat or Q&A to interact with the organizer(s) and presenter(s). If the webinar will be large, we recommend having at least two people on hand to help manage Q&A and the presentation.
Scheduling a Webinar
-
In the Teams calendar, select the arrow next to New and select Webinar.

-
Enter the webinar details.

-
On the New webinar page, enter the title and date of the webinar, its start and end times, and a description. You can also add presenters and co-organizers to the event.
Tip: Consider setting a later start time for attendees on the registration form to give yourself and presenters time to prepare together before the event begins.
-
By default, the webinar will be Public, which allows anyone to register. You can change it from Public to Your organization, which will make the event page and registration available only to people within Stonehill.
-
In the Attendee experience section, you can control if you want to allow attendees to use their mics and cameras, as well as enabling or disabling Q&A.
-
Click Meeting Options to access more advanced options.
Tip: In Meeting Options, consider turning Meeting Chat off under Participation. If you have Q&A enabled, disabling the chat is a good idea so you don't have to monitor two places for potential questions.
-
Select Save to move onto registration, invites will be sent to co-organizers and presenters automatically.
Back to top
Registration for Attendees
Registration requires attendees to complete a brief form that collects their full name and email addresses. Attendees receive a confirmation email that provides a summary of the event, a link to join the webinar and call in numbers, if enabled. The email address for questions and a link to cancel their registration is also included. Attendees will be automatically approved and hosts can check the status of registrations on the Attendee status section of registration. During webinar scheduling, hosts may:
- Include photo, name, title, and bio for up to 3 speakers on the registration page
- Collect additional data during registration, but not PII or confidential information, using the Add field button.
- Send a reminder email either 1 hour, 1 day or 1 week before the event
When ready, click Publish Site to make the registration page active. If needed, access the Registration settings again by opening the event in your Teams calendar and click manage event.
Back to top
Invite Attendees to a Webinar
The webinar registration link will be provided to the host, who should then share it via email to encourage attendees to register. By default, attendees are view-only participants who can be un-muted only if the host chooses. Their view of the webinar is controlled by the host. Attendees can interact with the host and panelists through the Q&A and the chat, depending upon what the host enables. Note that registrations will not be allowed after 1,000 participants have been reached.
Back to top
Recording a webinar
By default, a webinar will automatically start recording when it begins. To start a webinar, join the webinar from your Teams calendar and select Start meeting in the meeting controls when you’re ready.
Stop Recording a Webinar
You can stop a webinar recording by turning off the automatic recording in your webinar settings. You can also stop recording during the webinar.
To turn off automatic recording before a webinar:
-
Go to your Teams Calendar.
-
Open your upcoming webinar.
-
Select Meeting options.
-
Under Set the Record and transcribe automatically drop-down menu to off.
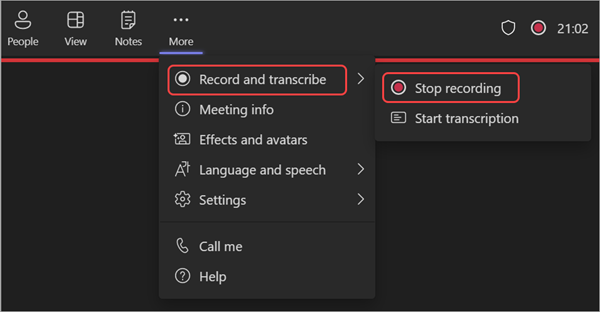
To stop recording during a webinar, select More actions… > Record and transcribe > Stop recording.
Access a Webinar Recording
To access a past webinar recording:
-
Go to your Teams Calendar.
-
Open the past webinar.
-
Select Manage event > Recordings.
Publish a Webinar Recording
When you publish a webinar recording, registered attendees will automatically receive an email with a link to the recording.
To publish a webinar recording:
-
Go to your Teams Calendar.
-
Open a past webinar.
-
Select Manage event.
-
Go to Recordings and find the recording you want to publish.
-
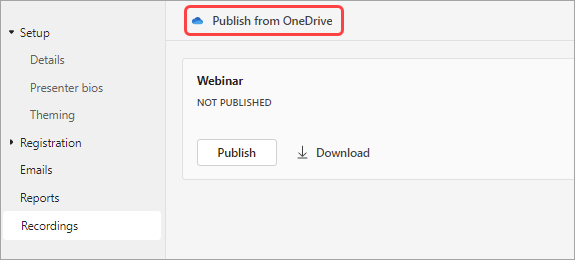
Select Publish.
-
If your recording was saved in OneDrive, select Publish from OneDrive
Unpublish a Webinar Recording
To unpublish a webinar recording, return to the recording and select Unpublish.
By default, published recordings will expire 30 days after you publish them. You can extend them by choosing Extend for 60 days next to the published recording. After the new date passes, you’ll have to reupload and republish the file to keep sharing.
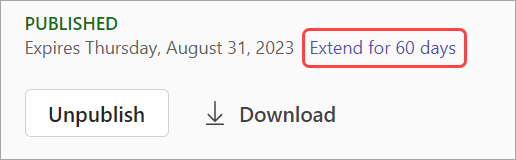
You can also select Download to save the recording to your device.
Back to top