All Stonehill instructor PC workstations have the Panopto recorder installed. The recorder is also available for download on any personal computer.
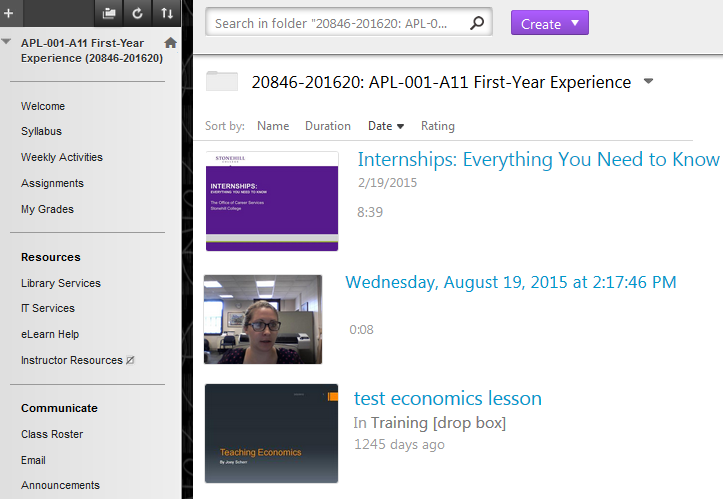
1. Login to stonehill.hosted.panopto.com and access the folder where you wish to save the recording
2. Click the Create button, then select Panopto for Windows (or Mac).
3. Select Launch Panopto to open the Recorder. (Panopto is installed on all classroom workstations; if using your own computer, install the appropriate Windows or Mac version of the recorder).
4. Select the Primary Source video and audio inputs and add or remove other Secondary Capture Sources, such as Capture Main Screen and/or PowerPoint, by checking the boxes.


You are ready to start recording . . .
- FOR PC USERS
- Record: F8 Key
- Pause: F9 Key
- Stop: F10 Key
- FOR MAC USERS
- Record: Option + Command + R
- Pause: Option + Command + P
- Stop: Option + Command + S
5. When recording is stopped you have the option to change the session name, add a description and either delete the recording or upload to the folder.
6. From the Manage Recordings tab, wait for the upload to process your recording on the Panopto server.
7. Your video will be available to view within a short period of time in your Panopto folder, once it finishes processing.
For more help, watch these tutorials:
How to Record with Panopto for Windows
How to Record with Panopto for Mac
Back to Top
Creating a Panopto Recording in a Browser
If you are unable to install the full Panopto application, you can record right in your browser using Panopto Capture.
- Login to Panopto at https://stonehill.hosted.panopto.com and access your desired folder.
- Click the Create button, then select Panopto Capture. You can also access this option when editing a Canvas Page by clicking the Panopto icon in the Rich Content Editor.

- Click the Audio button to select your microphone. If you are prompted to give Panopto permission to access your microphone, click Allow.
- Click the Video button to select your camera. If you are prompted to give Panopto permission to access your camera, click Allow.
- Click the Screens and Apps button if you wish to record your screen or a particular program. Select what you wish to share and click Share. Note: Safari users may be prompted to Allow it to observe your screen. Mac users should read this article for further settings that may need to be enabled.
- The Settings button allows you to control the quality of the recording and to do things like add a background image or blur your background.
- Click Record when ready, after a countdown the recording will begin. Click Stop when finished.
- The post-recording window will open. You can give the recording a name and choose the folder where you'd like to save it. Don't close this window until you see a message that says: Getting your video ready for editing: It's safe to close your browser window.
Back to Top
Uploading Media Files from Other Sources
You can upload already existing video files into your Panopto folder by using the steps below.
- Log into Panopto at https://stonehill.hosted.panopto.com and access your My Folder. You can also create new folders in here using the Add folder button.
- After choosing your desired folder, click the Create button at the top-left of the page, then select Upload Media.

- Drag and drop the video file(s) or click inside of the box to select the file from your computer. You can drop multiple files into the video upload window at one time to create multiple sessions.

- Wait for Uploading to finish. The status will now change to Processing. You can close this window, it will continue processing in the background. Note: processing time is determined by length of the recording. For supported media file types, see Learn About Supported Media File Types for Uploading.
- Once processing completes, you will receive an email that the sessions are ready to view.
Back to Top
Editing a Panopto Recording
- Find the session you wish to edit, hover over it and click Edit to open the Panopto Editor.
- The timeline editor displays along the bottom of the page. You can highlight sections to trim them out of the recording. Click and drag a section of the timeline, and it will be highlighted in gray: the gray area will then be cut from the recording's playback. You can select multiple areas to trim.

If your video is long, the timeline will condense to fit the window's size. You can zoom in using the magnifying glass icon at the right of the timeline to be more granular with your trimming.

- When you are satisfied with your edits, click the purple Apply button at the top of the page to save them. Any edits to the timeline are non-destructive meaning they can be re-added to the recording playback. To put something you've trimmed back into the timeline, simply click and drag the mouse over the gray area and that section should no longer be highlighted, be sure to click Apply when done.
Back to Top
Adding a Panopto Video to a Canvas Course
Embed a Panopto Video in a Page
A video can be embedded wherever the Rich Content Editor is used: Pages, Assignments, Discussions, Quizzes. The most common use will be on a Page, which also lets you add text before or after the video if you want to give some context.
- Access an existing Page and click Edit, or create a new one from the Pages index in the course menu and click View All Pages then the +Page button.
- In the Rich Content Editor add any text, links, images, etc. that you want to accompany the video and click the Panopto button:

- Select the Folder where your video resides from the drop-down menu.
- Click the Circle next to the video and click Insert. You could also upload a video or record a new one from this window:

- Your video will now be embedded on the page. You do not need to worry about any permissions: if a student accesses the video from the Canvas course, it will automatically grant permission the first time they access it.
- Save or Save & Publish your page.
Back to Top
Link to a Panopto Video in a Module
- Access the Modules page in your course.
- Find your desired module and in the Gray Module Title Bar click the + button:

- Select External Tool from the drop-down menu and select Panopto from the list:

- Select the Folder where your video resides from the drop-down menu.
- Click the Circle next to the video and click Insert. You could also upload a video or record a new one from this window:
- Click Add Item.
Back to Top
Add Panopto Folder to Course Menu
You can enable a link to the Panopto tool in the course menu that will also create a course folder in Panopto. This is a good option if you want to record a class or lecture and post it to the course automatically.
- Click the Settings link at the bottom of your Course Navigation menu.

- Click the Navigation tab.

- Find Panopto Video in the list of items.

- Click the three dots next to Panopto Video and select Enable.
- Scroll down to the bottom of the page and click Save.
- You can now access the course Panopto folder via that link. Inside the folder is a Create button, which lets you create new recordings that will appear in the folder for student access.

- If in a classroom, choose Panopto for Windows

- Click Launch Panopto to open the app. Follow instructions above for starting the recording.
Back to Top
Student Video Assignments
You can have students submit a Panopto video rather than having them upload an .mp4 to the course. This helps reduce the amount of storage used in the course.
To create an Assignment in Canvas:
- Access the Assignments link in your course.
- Click the +Assignment button:

- Add the details to your assignment such as Name, Instructions, Points, Assignment Group, Grade Display.
- For Submission type, ensure Online is selected in the drop-down menu and check the Text Entry box.
- Configure any other desired settings such as Due Date and Submission Attempts.
- Click Save or Save & Publish. You can then add this assignment to a module or page so students can access.
Back to Top
Submitting the Assignment in Canvas
- Students will access the Assignment in the course and choose Text for submission type.
Note: students can also use this method to post a video in a discussion post.
- In the Rich Content Editor click the Panopto button (if it's not visible, try making the browser full screen, or find it under the plug icon).
- Make sure the drop-down menu is set to My Folder, click the Upload tab and click the icon to browse for their saved video. They could also record from this window under the Record tab:

- Click Insert. Their Video will now be embedded in the Assignment. They can also add any text, links or images here as needed.
- Click Submit Assignment.
- You can open the Assignment in SpeedGrader to view/grade their submission and leave feedback.
Back to Top
Make Viewing a Panopto Video a Canvas Assignment
You can create a Canvas assignment that links to a Panopto video and gives a score based on the percentage of the video that has been watched. This is an easy way to track who has watched a video and to give them credit for it.
Note: Grades are not sent to Canvas until three hours after the user has started watching the video. Panopto advises against having a quiz within the same video you are scoring based on % viewed as it could cause incorrect grades to be sent. Also, you may want to consider disabling Forward Seek for any video where you are using this workflow. Disabling Seek can only be done on one video at a time, see Panopto's instructions here.
- In your Canvas course, click the Assignments link and +Assignment to begin creating a new assignment.
- Give the assignment any instructions, and point total. The Display Grade as needs to be set to Points, Panopto does not support the other types at this time. The name of the assignment will be automatically set to the name of the Panopto video that you link to. If you want to rename the assignment, you can do so after you've chosen your video in Step 7.
- Change the Submission Type drop-down to External Tool and click Find.

- Select Panopto Video from the list of tools.

- Select Grade on % Viewed and click Continue.

- Select the Folder where your video resides from the drop-down menu.
- Click the Circle next to the video and click Insert.
- Click Select and set any other desired settings such as Due Date, and the click Save or Save and Publish.
Back to Top
Use a Panopto Quiz as a Canvas Assignment
You can add quiz questions at any point during a Panopto video. For steps on adding a quiz to a video, see instructions here. Once a video has quiz questions inserted, you can make a Canvas assignment that students will watch and answer the quiz questions. The scores will then be sent to the Canvas Gradebook.
- In your Canvas course, click the Assignments link and +Assignment to begin creating a new assignment.
- Give the assignment a name, instructions, and point total. The Display Grade as needs to be set to Points, Panopto does not support the other types at this time.
- Change the Submission Type drop-down to External Tool and click Find.
- Select Panopto Video from the list of tools.
- Select Grade on quiz results and click Continue.

- Select the Folder where your video resides from the drop-down menu.
- Click the Circle next to the video and click Insert.
- Click Select and set any other desired settings such as Due Date, and the click Save or Save and Publish.
Note: for the grade to be passed to Canvas, the student must complete all quiz questions and there is no partial credit. The gradebook will only show the score. For detailed quiz results, you will need to access the Settings area for the video in Panopto directly and look for the Quiz Results option in the settings menu. Results can be downloaded as a .csv.
Back to Top
Downloading a Panopto Video
You can download a copy of a Panopto video for offline use or storage. Note: you can only download a video for which you have creator rights, or one where the creator has given you permission to download.
- Open your video and click the Three dots button near the top-right of the screen.

- The default download quality is 720p. If you need higher resolution, click the Gear Icon near the top-right of the screen to open Settings.

- Click the Outputs option from the left-hand menu.
- Change the Quality drop-down menu to your desired setting and click Apply.
- Click Download Podcast.
- The file will now be saved to your browser's default save location. You can store your video on your computer, or upload it to your OneDrive as a backup.
Back to Top
Moving Videos to a Different Folder
Over the years your videos may be scattered throughout various course folders, making it difficult to find a particular video if you'd like to reuse it.
Our recommended way to organize your videos is to create subfolders in your My Folder area in https://stonehill.hosted.panopto.com using the Add folder button. For example, you could create a COM-101 folder and put all your videos related to that course in there.
You can locate older videos using the search field at the top of the Panopto window if you know the name of your session, or you can use the Browse button to browse a particular course folder if you know the Course ID of the old course. Videos can me moved one at a time or multiple videos in the same folder can be moved in bulk.
Back to Top
Moving a Single Video
- Login to https://stonehill.hosted.panopto.com and find your video.
- Hover over the video and click the Settings gear icon that appears.
- Click the Edit button under the Folder area:

- The Folder option will change to a drop-down menu. If you want to move the video into your personal Panopto folder, choose the My Folder option, or a sub-folder therein from the drop-down list. If you want to move it somewhere else, you can type the name of the folder directly in the drop-down field to search for it.
- Click Save when finished.
Back to Top
Moving Multiple Videos in the Same Folder
- Login to https://stonehill.hosted.panopto.com and find the folder that contains your videos.
- Hover over one of the videos and put a check in the little box that appears in the top-left of the video thumbnail.
- Once one video is checked, the rest of the videos will also display the check box, simply check any video you wish to move, or there is a check box at the top of the page that will select all videos:

- Click the Move button along the top of the screen.
- Choose a destination folder from the drop-down menu and click Move.
Back to Top
Content Retention Policies
Once per year in mid-June, our retention policy will run, which will delete any video that has not been viewed in over 4 years. Deleted videos are not recoverable. If you have videos you are concerened will be affected by the retention policy, you should make a backup of your videos by downloading them and then uploading them to your OneDrive. You can also simply open the session and watch it for a few seconds, which will reset the last-viewed date counter for it.
Back to Top
How to Use the Panopto Mobile App
- Search for Panopto in your phone's App Store and download it.
- Log in to the app using your Stonehill email address then select Next to complete the login process.

For more help with Panopto on mobile, click the button below.

Back to Top
Panopto Video Tutorials
A comprehensive library of Panopto how-to videos including how to view, record, and edit can be found by clicking the button below.
Back to Top